Installing android apk to your Window device
Yes, it is now possible as the common method before was to use third party
apps like BlueStacks, Nox, or Memu emulators, this time we can use ADB to push
and install apk with the aid of WSA.
Since it is new, expect that not all apps that you successfully install would
run or work properly like when you are using your android device.
Windows comes with an option to access android apps using
Windows Subsystem for Android (WSA) through Amazon Appstore but would
be limited to supported apps unlike if directly downloaded from Google Play
Store.
Besides if Amazon Appstore is installed, it is not possible to install the
Google Play Store anyway as per comments from experts, that is why
ADB sideload process is one way to install android apks.
Quick Summary:
1. Prepare your apk to install
2. Install Amazon Appstore from Microsoft Store
3. Enable Virtualization from Bios and from Control Panel under Programs
windows and features
4. Install ADB to your computer
5. Set the Path of ADB in your System properties Environment Variables
6. Turn on Developer Mode in WSA under Advanced Settings
7. Turn on Developer options and USB debugging in WSA under Manage Developer
settings
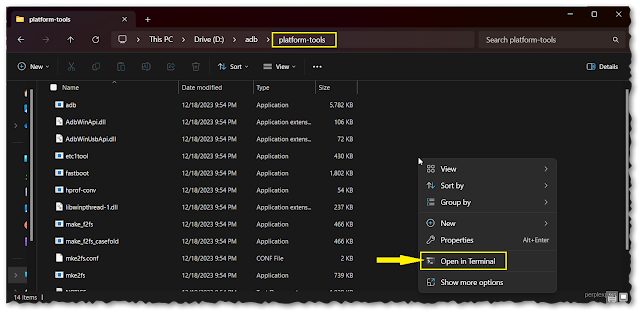
8. Open terminal (powershell) in platform tools folder (right click open
terminal)
9. Type adb devices and hit enter to check if connected
10. Type adb install (Directory of apk)
Android APK (Where to get?)
You may get the apk in APKMirror or APKpure sites, or install in your android
devices then extract the apk using Apk Extractor app.
Default WSA via Amazon Appstore Installation
For you to be able to install the WSA, simply install first the
Amazon Appstore in Microsoft Store as it will auto install the WSA
needed.
Before you do that go first to your settings and change region to US as shown.
While WSA being installed, pop up window will show asking if you want to share
diagnostic data, just click continue to finish WSA installation.
Restart your PC after installing Amazon Appstore and press DEL key or F1, F2
to enter your BIOS depending on your computer manufacturer and check if
Virtualization is enabled, use the arrow keys to navigate your
BIOS.
Once your computer boots up, go to your control panel and click on
Programs, click Turn Windows features on or off.
Look for Virtual machine platform and hypervisor platform and
tick the box to activate as shown. Restart to apply these changes.
For Windows 11 Pro there is a default Hyper-V which you must
also check to activate, Windows 11 Home SL/edition don't have this feature and
needs a script to install this in your computer.
FOR WINDOWS 11 HOME edition ONLY!!!
Skip if using Windows Pro and already have the Hyper-V
Open platform tools folder and right click on address bar and
copy address as shown (save to your
notepad editor if needed).
Open your notepad editor paste the code below and save it to any name you
want but make sure to end with .bat extension instead of
.txt
Type Y to restart
Code:
pushd "%~dp0"dir /b %SystemRoot%\servicing\Packages\*Hyper-V*.mum >hv-home.txtfor /f %%i in ('findstr /i . hv-home.txt 2^>nul') do dism /online /norestart /add-package:"%SystemRoot%\servicing\Packages\%%i"del hv-home.txtDism /online /enable-feature /featurename:Microsoft-Hyper-V -All /LimitAccess /ALLpause
It should look like this then save as hyperv.bat or any name you
want and end with .bat to any location in your PC that you can
easily access.
Right click file and run as Administrator as it installs the
packages as shown.
Now check in Control Panel inside programs to check if
Hyper-V is activated.
ADB Download and Install
Go to this
link
and download the adb for windows.
Extract the zip file and copy the platform tools folder to any
location of your drive (Drive C or Drive D if you have a second partition).
This copied address you will paste in system variables.
Type and search environment variables, click to edit (or advanced system
settings)
If No Path Exist?
Check if no Path exist under system variables and create a new one
and follow as shown below, on number 4 step you paste the platform tools
address you copied earlier.
IF Path EXISTS!If Path exists, click the Path and click on edit,
click new and paste as shown.
ADB Set up in Windows Video
Open WSA in your Microsoft Store Library Turn on Developer mode just under
Advanced Settings
Switch to turn on (copy the IP address that will show up)
Click Manage Developer settings and turn on developer options and usb
debugging.
Go back to your platform tools folder and open, right click to any blank space
to open terminal.
Type the following codes when terminal opens
adb devices
adb connect 127.0.0.1:58526 (double check the IP in your WSA)
Allow ADB debugging to fix failed to authenticate error.
If fail to authenticate, watch for WSA pop up window asking to
allow ADB
Go to where you saved those apk you wish to install and copy address like
what you did in your platform tools folder.
APK INSTALL Code
Type in terminal this code syntax:
adb install (Directory and name of apk)
sample demo only:
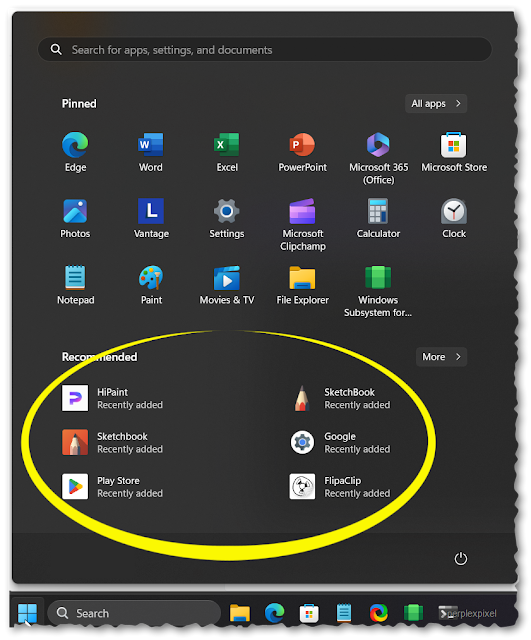
Congrats! You should find your installed app in your start menu and try
to launch.
INSTALLING LOWER VERSION (Downgrade)
Supposed you updated a new version of app and suddenly it doesn't work, simply downgrade to the previous version by using the syntax below.
adb install -r -d (Directory and name of apk)
As mentioned
here using the default WSA with my Windows 11 Home SL, I managed to
install the apps via ADB but found some issues like app won't run or won't
open at all, one app started to launch but would no longer continue to the
next window.
Therefore, my only work around for Windows 11 Home OS was to install the
modified WSABuilds by MustardChef in github, also found in
XDA
forum which initially installed the Google Play Store as well.
Read tutorial
here
on how to install Play Store which is much easier than this ADB Sideload
method.
ADB SIDELOAD ALTERNATIVE
Here's an easier way to install apk if you find adb via cmd tedious, just
download WSA Sideloader in Microsoft Store and follow short video tutorial
below.
Enjoy! 😁


