Photoshop not just an editing software but a powerful tool you may use to create some art works. Some movie posters as you may already know were done in Photoshop in the form of a VEXEL style of art and if you may wonder how it is done, it's simple made out of number of layers on top of each other.
 |
| Loona |
Vexel art a combination of pixels (Raster images) and vector look style unlike for Vector arts composed of vector layers which maintains its quality when scaled up.
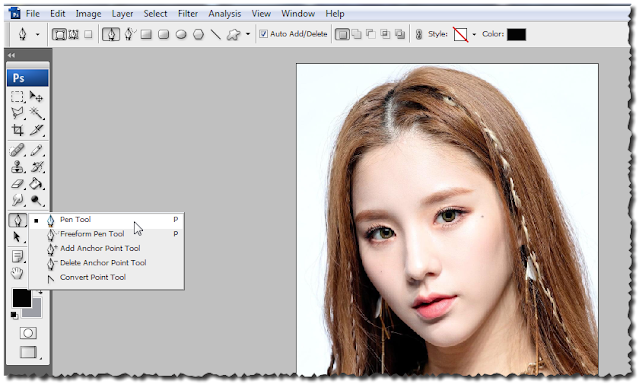
Since Photoshop is well known for using layers similar to other drawing or editing apps, you must first familiarize with the use of the Pen Tool (P) as most of the time you will be using this to trace your reference image.
You may download the PSD file here.
Pen Tool
Quite annoying to use at first but once you get used to it then you won't have a hard time for your next art works.
Be sure to set at "shape layers" (upper left corner beside pen tool icon) and not on path when tracing your reference image.
Sample shape layer using the pen tool output
DEMO
Just a quick demo how the Pen Tool works, you need to press CTRL or ALT to make the necessary changes and adjustments to your drawn shape layer.
Just use the eyedropper tool to match with the color of your reference image or may use your custom color palette.
sample below
No definite or fix rule to where to start tracing the image, you may start anywhere you like say from eyebrows, the eyes, lips or the overall shape of your reference image.
LAYERS
To easily access which part of the image you have finished when you want to make any adjustments, practice the habit to group them in separate folders or if you don't want in groups then properly name the layer for your ease.
You may use the eraser tool and adjust opacity with some clipping mask in layers as needed, so you may play around which would be best to blend your layers to get the best results.
You may get some ideas here credits to @awvexel in YT
SKIN TONES
You must practice to imagine the light source location from your reference image for you to understand why certain parts will turn out to be light, mid to dark tones plus the highlights.
This give some contrast which will help your art work stand out.
credits to kankdesign (pinterest)
PALETTE
Sample skin tone download here.
Have the patience when you will be doing some Vexel arts as this will take some time starting from your line arts to applying the different shades and shadows to give depth and make your drawing more interesting.
You may start from still objects as your training grounds or may directly start practicing from portraits until you master the use of pen tool then gradually practice blending those layers after layers.
If you have no access to Photoshop you may check alternative programs like Inkscape or Gimp and start your vector/vexel art and bring out your own hidden talents.
A quick sample from my practice of vector art using Inkscape, not much but somehow it's workable for my own take.
Dr. Strange
Do you have some art works to share, drop them down from the comment section with the links for others to see and appreciate.


0 Comments